Ever installed a downpipe spreader and wondered if it complies? Look no further, in this edition Master Plumbers’ technical advisor, Sam Welsh, talks roof spreaders and flashings.

Spreaders may be used to drain rainwater from a higher roof surface with a catchment area not exceeding 15m², provided the conditions of the standards are satisfied. See figure 1.
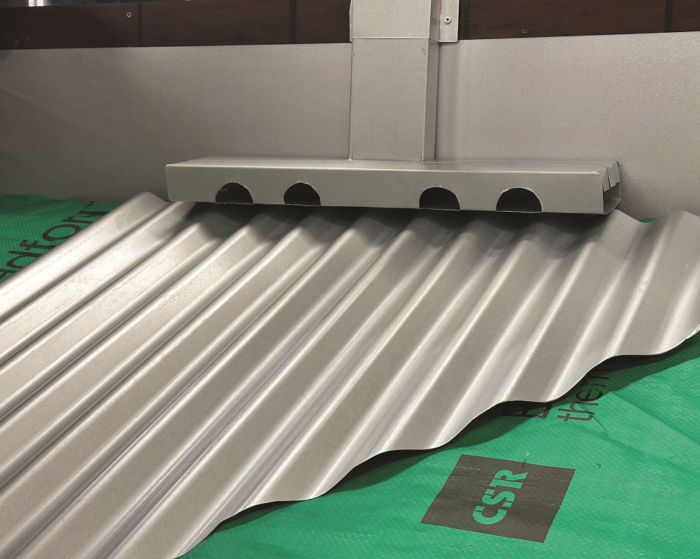
Figure 1
When installing a spreader onto a lower roof section, there are quite a few limitations on where you can and can’t have the spreader discharging.
As HB 39 states, no spreader is to discharge roof water onto or over ridge tiles, mortar-jointed tiles, flashings, timber fascia or a roof sheet side lap.
Discharging water from a spreader must not enter any part of a building. Spreaders also must not discharge onto roof sheets or tiles discharging to a valley. The increased water volume from the upper roof is not to enter any seam or lap of the roof coverings of the lower roof section. Very importantly, spreaders should discharge all roof water onto roof coverings in the same direction of flow.
Now we have the upper roof catchment water discharging, can the lower roof handle all this extra water?
When discharging an upper roof catchment onto a lower roof, the total roof area including the additional upper roof catchment area is to be considered for inclusion when sizing the lower roof’s gutters, down pipes, while ensuring the overflow provisions are sized for the additional load.
When looking at tiled roofs, should you sark?
When discharging onto a tiled roof, the lower section is to be sarked a minimum width of 1800mm, either side of the point of discharge extending down to the gutter.
Furthermore, consideration should be given to sarking the roof below any upper gutters to allow for any overflow provision of the higher catchment areas.
What about metal roofing?
When the spreader discharges onto a corrugated roof, each lap within a minimum of 1800mm either side of the point of discharge is to be sealed the full length of the laps.
Ever installed flashings and wondered how to meet the deemed to satisfy provision of the Australian standards with fixing flashings to the roof and joining to other flashings?
(a) Fixing of flashings
Roof flashings and cappings are to be tightly notched and fastened. When installing flashings onto a concealed fastened roof, you can fix flashings down with rivets or self-drive tapping screws at intervals no more than 300mm. When installing flashings on corrugated roof using self-drive tapping screws or rivets and fixed every fourth rib.
(b) Jointing of flashings and capping
Joints are to be no less than 25mm cover of lap and fastened at intervals not exceeding 40mm centers and sealed. Joints are to lap in the direction of flow. Joints in flashings and capping’s other than straight joints must be accurately mitered, fastened, and sealed. All joints are to be watertight on completion of the installation. See figure 2.

Figure 2
Furthermore, parapet capping’s are to be fixed to parapet walls at intervals not exceeding 500mm with masonry anchor and cleats that permit longitudinal expansion and contraction. A minimum fall of 3° is to be provided across the width of the flashing, allowing water to divert back onto the roof coverings. This prevents the water from dripping down the fascia causing unsightly staining.

Advertisement
Share this Article